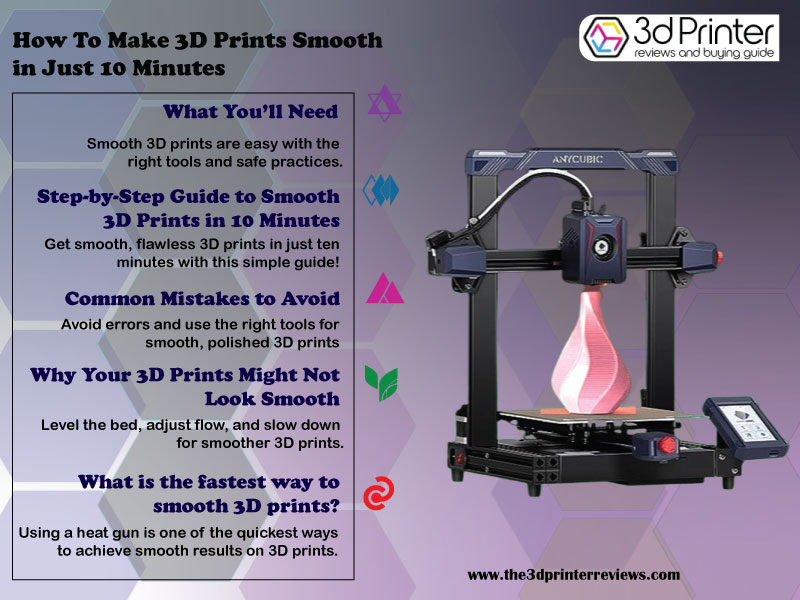
3D printing is growing rapidly, projected to hit $135.4 billion by 2033, with a yearly growth rate of 21.2%. Its ability to craft intricate, customized designs makes it a favorite for industries and hobbyists. Yet, figuring out how to make 3d prints smooth can still seem tricky.
Smooth prints aren’t just visually appealing—they ensure durability and functionality, whether for polished prototypes or end-use parts. The great news? You don’t need endless hours to achieve flawless results.
This guide explains exactly how to make 3D prints smooth in just 10 minutes. Whether you're a beginner or an expert, these tips deliver stunning finishes effortlessly.
Step-by-Step Guide to Smooth 3D Prints in 10 Minutes
Looking for the ultimate solution on How To Make 3D Prints Smooth easily? This step-by-step guide will help you achieve flawless, polished models in just ten minutes—perfect for hobbyists and professionals alike!
Step 1: Prep Your 3D Print
The first step to mastering How To Make 3D Prints smoothly is proper preparation. Clean your model by wiping off visible dust and debris with a damp cloth. This ensures that no imperfections get trapped during the finishing process. For quicker and better results, print at a higher layer height, like 0.2mm or 0.3mm. This reduces the number of layers, cutting down the smoothing work significantly.
Step 2: Apply Spray Paint
A crucial step in learning How To Make 3D Prints Smooth involves choosing the right spray paint. Opt for one that adheres well to plastic, and select a color that enhances your final design. Spray a light, even coat across the entire model to fill gaps and cover imperfections. Maintain a steady motion while spraying to avoid uneven textures. This initial layer forms the base for a sleek and professional finish.
Step 3: Seal with Polyurethane or Clear Coat
To truly perfect How To Make 3D Prints Smooth, follow up by sealing the painted surface with a thin layer of polyurethane or a clear coat. This step does more than enhance aesthetics—it seals layer lines, smoothens rough textures, and eliminates the need for extra sanding. The result? A durable, glass-like finish elevates your model to the next level.
Step 4: Speed Up the Drying Process
Drying plays a vital role in successfully executing How To Make 3D Prints Smooth. To reduce curing time, position your model under a fan or in a well-ventilated area. Rotate the model occasionally to prevent paint drips or an uneven finish. These techniques help speed up the process while keeping your model’s surface perfect.
Step 5: Final Touch-Up
The last step in How To Make 3D Prints Smooth is addressing any final details. Inspect your model for tiny rough spots or areas needing an extra coat. Apply touch-ups with precision, focusing on intricate parts by using a small brush or cloth to remove excess paint. This ensures a flawless, polished result that’s ready to impress.
With these steps, you’ve mastered How To Make 3D Prints Smooth in no time. These practical, effective techniques ensure that your models look professional and feel durable, whether you’re a newcomer or an experienced maker. Transform your 3D-printed designs into stunning pieces with ease!
Common Mistakes to Avoid
Learning how to make 3D prints smooth involves more than just using the right tools; it’s also about recognizing and avoiding certain errors that could ruin your results. By addressing these pitfalls, you can achieve a polished finish every time.
Uneven Coatings
One of the most common issues when trying to master how to make 3D prints smooth is the application of uneven coatings. Thin layers of paint or polyurethane can leave print lines exposed, while thick coatings might lead to unsightly drips or bubbles. The trick is to maintain a steady hand and keep a consistent distance when spraying or brushing. Take your time and ensure each layer dries completely before adding the next. Remember, patience and precision are the real keys to creating a smooth, professional finish.
Over-Smoothing
When learning how to make 3D prints smooth, many makers make the mistake of overusing smoothing agents. Excessive chemicals or sprays can distort delicate details, blurring grooves and intricate patterns. Instead, aim for moderation—apply light layers and assess the results before adding more. Following this approach helps preserve your print's sharp details and structural integrity. Plus, it reduces the risk of unintended damage, ensuring your final result looks as good as you envisioned.
By keeping these mistakes in mind, your path to achieving perfectly smooth 3D prints will be far less frustrating, and you'll enjoy beautiful, professional results with every project.
Troubleshooting Guide
Why Your 3D Prints Might Not Look Smooth
If you're wondering how to make 3D prints smooth but end up with rough results, uneven bed leveling or poor printer calibration are likely the culprits. A misaligned bed causes inconsistent material flow, while improper calibration results in flawed textures.
To fix this, re-level your print bed using your printer’s leveling feature to ensure proper alignment. Adjust the nozzle flow settings to match your filament—too much extrusion creates blobs, while too little leaves gaps. Decreasing your print speed can also significantly improve surface smoothness by allowing layers to set more accurately.
How to Fix Over-Textured Prints
Over-textured prints can obstruct your goal of learning how to make 3D prints smooth. These imperfections are easily corrected with a thin coat of polyurethane spray.
Start by cleaning your printer to remove dust. Then, apply an even coat of fast-drying polyurethane, covering all surfaces. Allow it to dry for a few minutes for a polished and professional finish. This simple step ensures smoother surfaces and added durability while enhancing your print’s final look.
With these quick fixes, mastering how to make 3D prints smooth becomes easier and achievable for every maker.
FAQs - How To Make 3D Prints Smooth
What is the fastest way to smooth 3D prints?
Using a heat gun is one of the quickest ways to achieve smooth results on 3D prints.
Can I use a heat gun on PLA prints?
Yes, but use it carefully to avoid warping or melting the surface while smoothing.
Is sanding the best method for making 3D prints smooth?
Sanding is the most reliable and beginner-friendly method for smoothing 3D prints.
Wrapping Up
Smoothing your prints is the secret to achieving polished, professional results. This guide on how to get smooth 3D prints simplifies the process, making it manageable even for busy makers while ensuring exceptional quality for every design.
Experiment with methods like sanding, priming, or resin coating to refine your prints and elevate their appearance. Start your smoothing journey today and share your results with the 3D printing community—your next flawless creation is just a few steps away!
Comments